Security cameras are supposed to make life easier. They watch over your property, send alerts when something moves, and give you the confidence that your home or business remains protected even when you’re away.
But technology isn’t perfect.
At some point, many owners find themselves searching for how to reset Reolink Argus PT camera devices after experiencing connectivity issues, forgotten passwords, app errors, or setup problems. Fortunately, resetting the camera is often a quick and effective solution.
The key is knowing when to reset, how to do it correctly, and what steps to take afterward. A factory reset can solve many common problems, but performing it incorrectly can create new ones.
In this guide, we’ll cover everything you need to know about how to reset Reolink Argus PT camera models, including preparation, step-by-step instructions, troubleshooting advice, and maintenance tips that help keep your camera running smoothly long after the reset is complete.
What Is the Reolink Argus PT Camera?
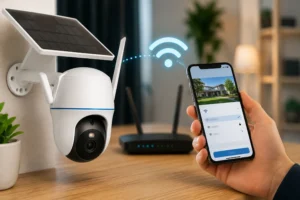
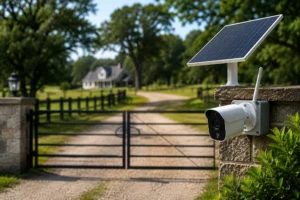
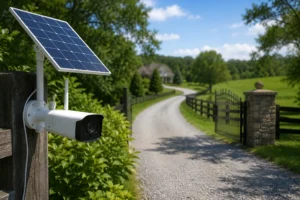
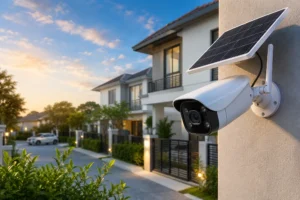
The Reolink Argus PT is a wire-free security camera designed for flexible installation and reliable surveillance. Unlike traditional cameras that require constant power from electrical wiring, the Argus PT operates using a rechargeable battery and can be paired with a solar panel for continuous charging.
One of its standout features is its pan-and-tilt capability. Rather than monitoring a fixed view, the camera can rotate remotely, allowing users to observe a wider area directly from the Reolink app.
Popular features include:
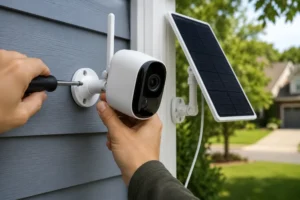
- Wire-free installation
- Rechargeable battery operation
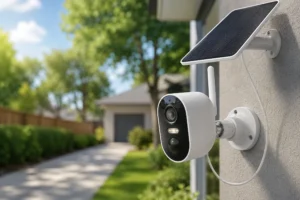
- Solar charging compatibility
- Pan and tilt controls
- Motion detection alerts
- Night vision
- Two-way audio
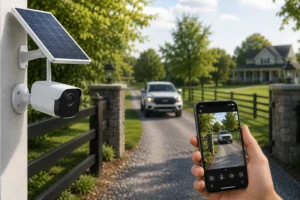
- Mobile app access
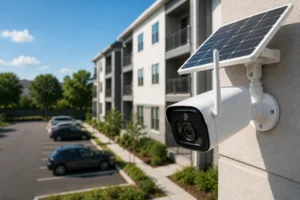
These features make it an excellent choice for homeowners, business owners, and anyone looking for a flexible security solution.
When a Reset Becomes Necessary
There are several situations where learning how to reset Reolink Argus PT camera systems becomes essential.
Common reasons include:
| Issue | Can Reset Help? |
| Forgotten password | Yes |
| WiFi connection problems | Yes |
| App communication issues | Yes |
| Camera ownership transfer | Yes |
| Motion detection glitches | Sometimes |
| Physical hardware failure | No |
A reset restores factory settings and removes existing configurations. This allows you to start fresh when troubleshooting becomes difficult.
Before You Reset Your Reolink Argus PT
Many people immediately reach for the reset button when problems arise.
That isn’t always the best approach.
Taking a few minutes to prepare can make the entire process much smoother.
Understand What a Factory Reset Does
A factory reset removes virtually all user-configured settings from the camera.
This includes:
- WiFi credentials
- Device passwords
- Motion detection zones
- Alert schedules
- Recording settings
- User configurations
Once complete, the camera behaves exactly as it did when first removed from the box.
Save Important Settings First
If your camera is still accessible through the app, take screenshots of important settings before proceeding.
Capture:
- Motion sensitivity levels
- Notification schedules
- Recording preferences
- Device names
- Network settings
These references make reconfiguration much faster later.
Verify Battery Charge
Power is critical during the reset process.
A weak battery can interrupt the reset and cause unnecessary complications.
Before performing a factory reset, ensure the battery has enough charge to complete the process. If your camera relies on solar charging and seems to lose power quickly, understanding Do Solar Cameras Need Direct Sunlight? can help you determine whether your panel is receiving adequate exposure throughout the day.
As a general rule:
- Charge battery above 20%
- Connect a charger if necessary
- Verify solar charging is functioning properly
A few extra minutes spent checking power levels can prevent frustration later.
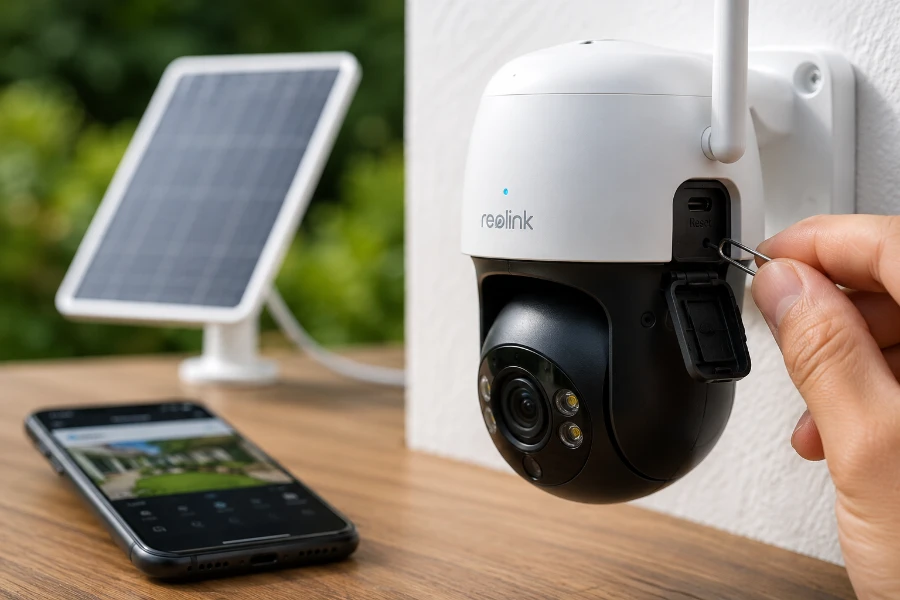
Where Is the Reset Button on Reolink Argus PT?
The reset button is hidden behind a protective cover designed to shield ports and components from dust and moisture.
Most users can locate it by opening the same compartment that contains:
- Charging port
- MicroSD card slot
- Device labels
The exact location may vary slightly depending on the production version, but it is generally easy to identify once the protective cover is opened.
Tools You May Need
Because the button is recessed, you’ll need a small tool to press it.
Common options include:
- Paperclip
- SIM card ejector
- Small pin
- Plastic reset tool
A standard paperclip works perfectly in most cases.
How to Reset Reolink Argus PT Camera Step by Step
Now let’s get to the main reason you’re here.
If you’re wondering exactly how to reset Reolink Argus PT camera models, follow these steps carefully.
Step 1: Power On the Camera
First, ensure the camera is powered on.
Look for:
- LED indicators
- Startup sounds
- Voice prompts
If the battery is depleted, charge the camera before continuing.
Step 2: Open the Protective Cover
Carefully lift the rubber cover protecting the ports and reset button.
Take a moment to inspect the compartment.
Look for:
- Dirt accumulation
- Moisture
- Corrosion
- Debris
Keeping this area clean helps maintain weather resistance and long-term reliability.
Step 3: Press and Hold the Reset Button
Using your paperclip or reset tool:
- Locate the reset button.
- Press and hold it firmly.
- Continue holding for approximately 10 seconds.
Do not release too early.
This is one of the most common reasons users believe the reset failed.
Patience matters.
Step 4: Wait for Confirmation
After holding the button long enough, the camera should provide confirmation.
This may include:
- Voice notifications
- Audio tones
- LED flashes
These signals indicate the factory reset process has started.
Step 5: Allow the Camera to Reboot
Once the reset begins, leave the camera alone.
Avoid repeatedly pressing buttons or attempting another reset.
The reboot process usually takes several minutes.
Interrupting the process can delay recovery and create additional setup challenges.
Signs the Reset Was Successful
After rebooting, the camera should behave as though it has never been configured.
Common indicators include:
- Startup voice prompts
- Flashing LEDs
- Setup-ready status
At this point, the reset is complete.
How to Reconnect the Camera After Resetting
Resetting the camera is only half the process.
Now you need to reconnect it.
Fortunately, setup is straightforward when performed in the correct order.
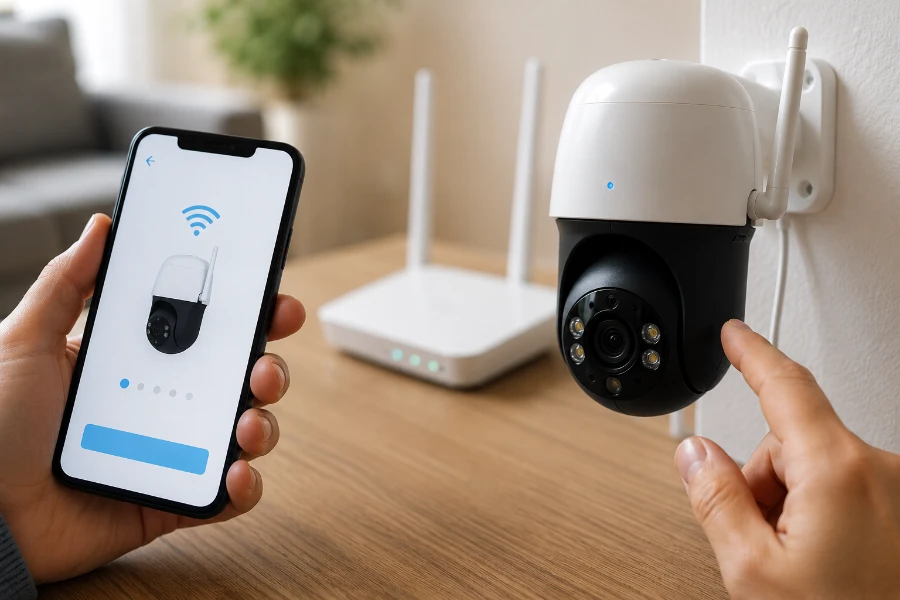
Open the Reolink App
Launch the latest version of the Reolink mobile app.
Before proceeding:
- Update the app if needed
- Sign in to your account
- Enable required permissions
Using current software helps avoid compatibility issues.
Add the Camera Again
Select the option to add a new device.
The app will guide you through:
- Camera discovery
- QR code scanning
- Device registration
Keep the camera nearby during the process.
Scan the QR Code
The Reolink app typically requires scanning the QR code printed on the camera.
For best results:
- Increase phone brightness
- Hold steady
- Maintain proper distance
If scanning fails, manual entry options are usually available.
Connect to WiFi
This is where many setup issues occur.
The Reolink Argus PT supports 2.4GHz WiFi networks.
Before connecting, verify:
| Network Requirement | Supported |
| 2.4GHz WiFi | Yes |
| 5GHz Only | No |
| WPA2 Security | Yes |
| Strong Signal | Recommended |
Entering an incorrect password remains one of the most common setup mistakes.
Double-check every character before continuing.
Complete Initial Configuration
Once connected:
- Create a secure password
- Configure motion detection
- Set recording preferences
- Test live viewing
- Verify notifications
With those steps complete, your camera should be fully operational once again.
How to Reset Reolink Argus PT Without the App
Sometimes the problem is the app itself.
Perhaps you’ve changed phones. Maybe you’ve forgotten your account credentials. In other situations, the camera may simply refuse to connect to the application.
Fortunately, you do not need app access to perform a factory reset.
The physical reset button remains the most reliable method.
Simply:
- Power on the camera.
- Open the protective cover.
- Press and hold the reset button for approximately 10 seconds.
- Wait for the camera to reboot.
- Listen for startup prompts.
This method completely restores factory settings regardless of whether the camera is currently connected to the app.
For many users, it’s the fastest way to regain control of the device.
Troubleshooting If the Reset Does Not Work
Occasionally, a reset doesn’t immediately solve the issue.
Don’t panic.
Most problems have straightforward solutions.
Camera Does Not Respond
If the camera shows no signs of life after pressing the reset button, power may be the culprit.
Check:
- Battery charge level
- Charging cable condition
- Charging port cleanliness
- Solar panel connection
Allow the battery to charge for at least 30 minutes before attempting another reset.
Reset Button Appears Non-Responsive
Sometimes the button isn’t being pressed long enough.
Try again and:
- Hold for a full 10–15 seconds
- Apply steady pressure
- Use a proper reset tool
Many users release the button too early and assume the reset failed.
Camera Won’t Connect to WiFi After Reset
This is one of the most common complaints after learning how to reset Reolink Argus PT camera devices.
Verify the following:
| Item | Check |
| Network Band | 2.4GHz |
| Password Accuracy | Correct |
| Router Signal Strength | Strong |
| App Version | Updated |
| Camera Firmware | Current |
Also remember that some routers combine 2.4GHz and 5GHz bands under the same network name. This can occasionally create setup challenges.
QR Code Won’t Scan
Try these quick fixes:
- Increase phone brightness
- Clean the camera lens
- Hold device steady
- Adjust distance slightly
Even small lighting changes can improve scanning success.
Wireless Interference Problems
In some situations, excessive electromagnetic interference generated by nearby electronics, wireless equipment, or industrial devices can affect WiFi communication and create connection problems during setup.
If you’re experiencing persistent connectivity issues:
- Move the camera closer to the router temporarily
- Reduce nearby wireless device congestion
- Restart networking equipment
- Test setup in another location
These simple adjustments often improve connection reliability significantly.
Common Mistakes to Avoid During a Reset
Learning how to reset Reolink Argus PT camera systems is relatively easy.
Avoiding common mistakes is even more important.
Resetting With a Low Battery
A partially discharged battery may interrupt the reboot process.
Always verify adequate power before beginning.
Releasing the Button Too Soon
Many users hold the button for only a few seconds.
A proper reset usually requires approximately 10 seconds of continuous pressure.
Forgetting Existing Settings
Once the reset is complete, previous settings disappear.
Take screenshots beforehand whenever possible.
Using Unsupported WiFi Networks
The Argus PT relies on 2.4GHz networks.
Attempting to connect to unsupported configurations often causes unnecessary troubleshooting.
Skipping Software Updates
After reconnecting the camera, many users forget to check for updates.
This can leave performance improvements and bug fixes unavailable.
When You Should Reset vs. When You Shouldn’t
A reset is a powerful troubleshooting tool.
It is not a solution for every problem.
Problems a Reset Can Fix
A factory reset often resolves:
- WiFi configuration errors
- Forgotten passwords
- App communication failures
- Setup issues
- User account changes
These situations frequently improve immediately after resetting.
Problems a Reset Cannot Fix
A reset cannot repair physical damage.
Examples include:
- Broken antennas
- Defective batteries
- Damaged charging ports
- Failed circuit boards
- Faulty solar panels
If hardware is damaged, repair or replacement may be necessary.
Additional Tips for Maintaining Your Reolink Argus PT
Resetting a camera solves problems.
Maintaining it properly helps prevent them.
Keep Firmware Updated
Keeping your camera’s firmware updated can improve reliability, strengthen security, fix software bugs, and ensure compatibility with newer versions of the Reolink application.
Check periodically for updates through the app.
Manufacturers frequently release performance improvements.
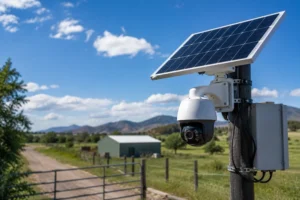
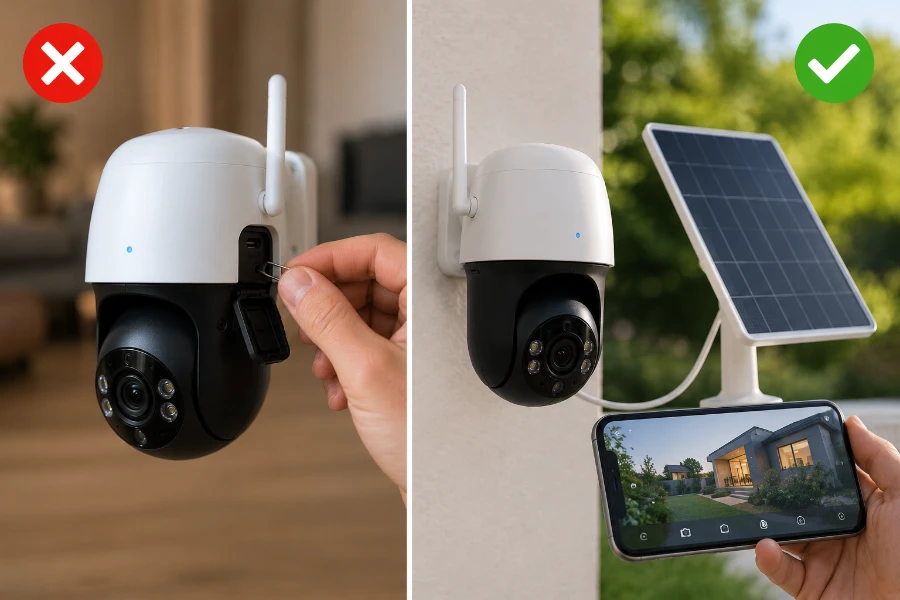
Optimize Solar Panel Placement
Solar charging works best when panels receive consistent sunlight throughout the day.
Poor placement can lead to battery drain and reduced performance.
If you’re unsure whether your setup receives enough sunlight, understanding Do Solar Cameras Need Direct Sunlight? can help maximize charging efficiency.
Monitor Nighttime Performance
Many users assume solar-powered cameras stop functioning after sunset.
That isn’t the case.
Battery performance plays a major role in nighttime surveillance. If you’re wondering how solar-powered cameras continue operating after dark, this guide on Do Solar Security Cameras Work at Night? explains how stored energy powers recording and motion detection overnight.
Clean the Lens Regularly
A dirty lens can reduce image quality dramatically.
Every few weeks:
- Wipe dust away
- Remove spider webs
- Clean water spots
- Inspect for scratches
Small maintenance habits often deliver noticeable improvements.
Review Motion Detection Settings
Environmental conditions change throughout the year.
Trees grow.
Lighting changes.
Weather shifts.
Reviewing motion sensitivity periodically helps reduce false alerts while maintaining effective monitoring.
Conclusion
Knowing how to reset Reolink Argus PT camera systems is one of the most valuable troubleshooting skills a camera owner can learn.
Whether you’re dealing with forgotten passwords, WiFi issues, app connectivity problems, or preparing the device for a new owner, a proper factory reset often provides a clean and effective solution.
The process itself is simple. Power on the camera, access the reset button, hold it for approximately 10 seconds, and allow the device to reboot fully. From there, reconnect the camera through the Reolink app and restore your preferred settings.
Most importantly, don’t overlook routine maintenance. Keeping batteries charged, firmware updated, and settings optimized can prevent many problems before they ever require a reset.
With the right approach, your Reolink Argus PT can continue providing reliable security for years to come.
FAQs
Press and hold the reset button for about 10 seconds while the camera is powered on, then wait for it to reboot.
Yes. A factory reset erases all network settings, passwords, and custom configurations.
Yes. The physical reset button allows you to restore factory settings even if the app is unavailable.
The reset process usually takes a few seconds, while the reboot may take several minutes.
Incorrect WiFi credentials, weak signal strength, or using a 5GHz-only network are common causes.
No. Videos stored on a microSD card are typically unaffected unless the card is manually formatted.
Make sure the camera is powered on and hold the button continuously for at least 10 seconds before releasing it.
In many cases, yes. A reset can resolve software-related settings problems affecting motion alerts.
No. Restarting simply reboots the camera, while resetting restores factory default settings.
Only reset the camera when troubleshooting persistent issues or preparing it for a new owner.