If you’re researching how to install Reolink Argus camera systems, you’re probably looking for a security solution that doesn’t require complicated wiring, professional installation, or a weekend of frustration. The good news is that Reolink’s Argus series was designed specifically for simplicity. These battery-powered cameras offer flexible placement, reliable monitoring, and optional solar charging without the headaches that often come with traditional security systems.
Whether you’re protecting a front porch, driveway, garage, backyard, or vacation property, learning how to install Reolink Argus camera devices properly can make a significant difference in performance. A well-installed camera delivers clearer footage, stronger wireless connectivity, more accurate motion detection, and longer battery life.
The process is surprisingly straightforward. However, there are several important decisions you’ll make before the first screw goes into the wall. This guide covers every step from unboxing to optimization so your camera performs at its best from day one.
Understanding the Reolink Argus Camera Before Installation
The Reolink Argus series stands out because it eliminates many of the limitations of traditional security systems.
Instead of relying on power cables and network wiring, these cameras operate using rechargeable batteries and Wi-Fi connectivity. This allows installation in locations where wired cameras would be impractical or expensive.
Popular models include:
| Model | Main Features |
| Reolink Argus Eco | Affordable wireless monitoring |
| Reolink Argus 3 Pro | Color night vision and spotlight |
| Reolink Argus PT | Pan-and-tilt functionality |
| Reolink Argus Track | Automatic subject tracking |
One of the biggest advantages of battery-powered security cameras is their flexibility. For remote locations where internet access is limited, readers may also find value in exploring a solar security camera without WiFi setup.
No matter which Argus model you choose, proper installation directly affects:
- Image quality
- Motion detection performance
- Wi-Fi reliability
- Battery longevity
- Alert accuracy
A great camera can only perform as well as its installation allows.
What Comes in the Box?
Most Reolink Argus packages include everything necessary for a standard installation.
You will typically find:
- Reolink Argus camera
- Adjustable mounting bracket
- Security mount
- Mounting screws
- Wall anchors
- USB charging cable
- Reset pin
- User manual
Some bundles may also include a Reolink Solar Panel.
Before starting, verify that all hardware is present and undamaged.
This quick check can save time later.
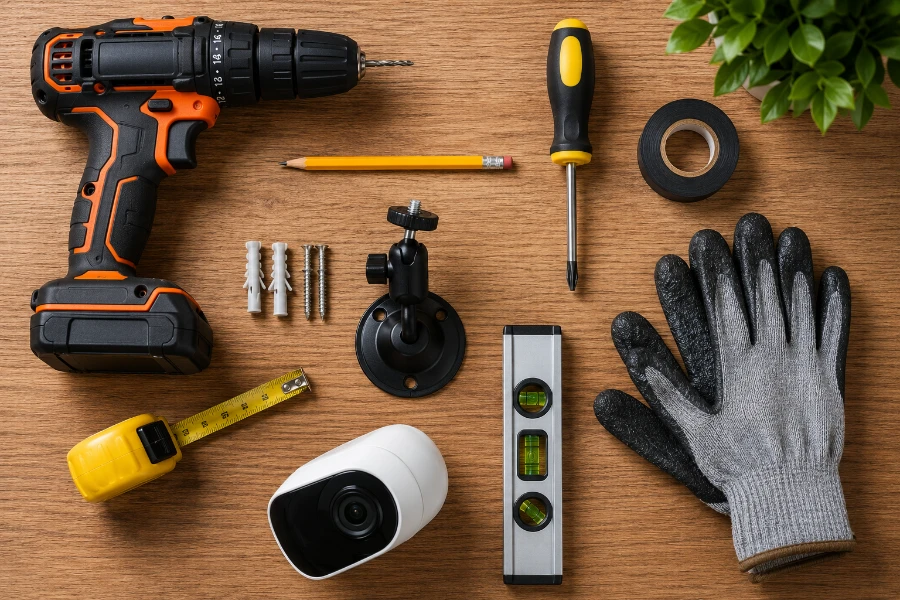
Tools You’ll Need
One reason homeowners like learning how to install Reolink Argus camera systems is that the tool requirements are minimal.
Basic Tools
- Drill
- Screwdriver
- Pencil
- Measuring tape
- Ladder
Helpful Extras
- Level
- Stud finder
- Exterior-grade sealant
- Cable clips
Most installations require less than an hour when the location has already been selected.
Choosing the Best Location
Location affects nearly every aspect of camera performance.
Choose wisely.
Priority Monitoring Areas
Start by securing the most vulnerable entry points:
- Front door
- Back door
- Garage entrance
- Side gates
- Driveway
- Backyard access
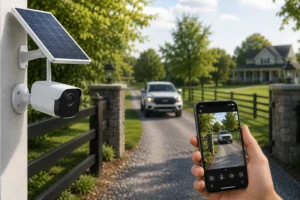
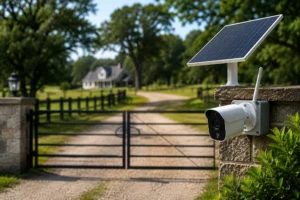
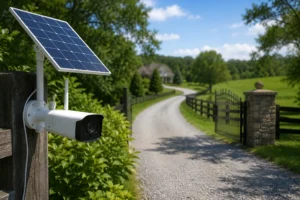
Driveways are especially important because they often provide the first indication of approaching visitors or vehicles. Homeowners focused on vehicle monitoring may also benefit from adding a dedicated solar driveway camera.
Recommended Installation Height
For most homes, mounting between 8 and 10 feet above ground provides the best balance between visibility and security.
Too low creates tampering risks.
Too high reduces facial recognition quality.
The goal is to capture useful footage, not just wide footage.
Common Placement Mistakes
Avoid installing your camera:
- Directly into sunlight
- Behind glass
- Near reflective surfaces
- Under moving branches
- Facing bright exterior lights
These conditions can create false alerts or reduce image quality.
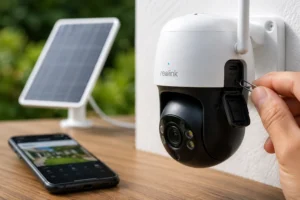
Step 1: Fully Charge the Camera
Before beginning setup, charge the camera completely.
Skipping this step is one of the most common mistakes made by first-time users researching how to install Reolink Argus camera systems.
A full charge helps:
- Prevent setup interruptions
- Support firmware updates
- Improve battery calibration
Depending on the model, charging may take several hours.
Wait until the battery indicator confirms a full charge before proceeding.
Step 2: Download and Install the Reolink App
The Reolink app acts as the command center for your entire security system.
Download the app from:
- Google Play Store
- Apple App Store
Once installed:
- Create an account.
- Verify your email.
- Enable notifications.
- Sign in.
The app controls:
- Live video viewing
- Motion detection settings
- Notification alerts
- Firmware updates
- Recording schedules
Everything begins here.
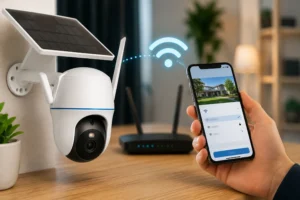
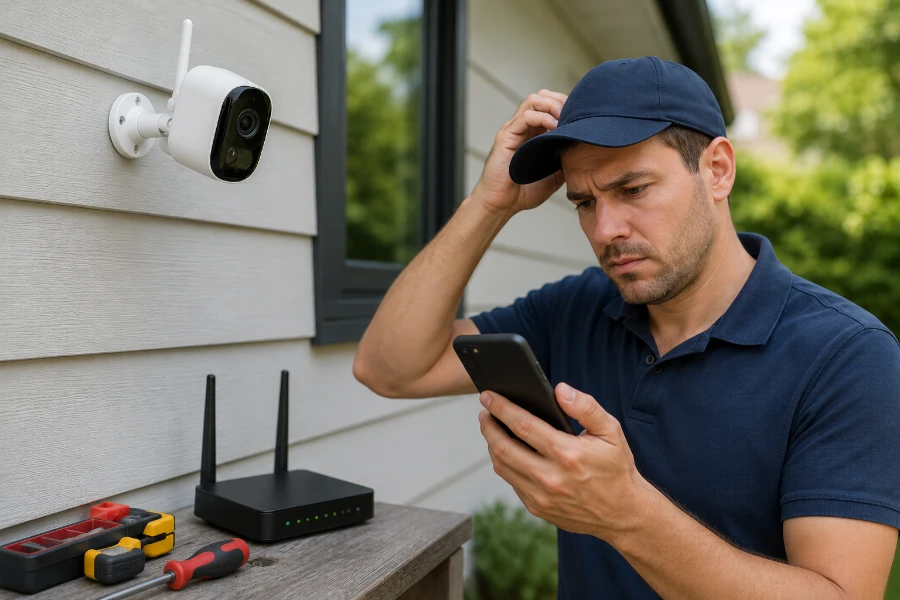
Step 3: Connect the Camera to Wi-Fi
Most Reolink Argus cameras connect using 2.4 GHz Wi-Fi.
Many modern routers offer both 2.4 GHz and 5 GHz networks.
Always confirm you’re selecting the correct network.
Setup Process
- Open the Reolink app.
- Select “Add Device.”
- Scan the camera QR code.
- Choose your Wi-Fi network.
- Enter the password.
- Complete the pairing process.
Within minutes, the camera should appear inside the app dashboard.
Connectivity Tips
Wireless signal quality significantly affects performance.
Nearby electronic devices can sometimes create electromagnetic interference, reducing wireless reliability and causing connection issues.
If the signal appears weak:
- Move closer to the router
- Reduce interference sources
- Reposition the camera
- Consider a Wi-Fi extender
Learning how to install Reolink Argus camera devices successfully often comes down to maintaining a strong and stable wireless connection.
Step 4: Test Before Permanent Mounting
Before drilling any holes, test the camera in the proposed location.
This simple step prevents unnecessary reinstallation work later.
Check:
- Live view quality
- Motion detection
- Notification speed
- Night vision performance
- Wi-Fi strength
Walk through the detection zone multiple times.
Review recorded clips.
Verify everything functions as expected.
Testing now is far easier than relocating a mounted camera later.
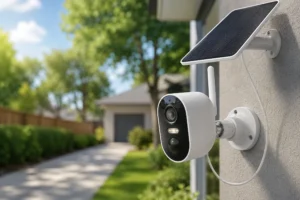
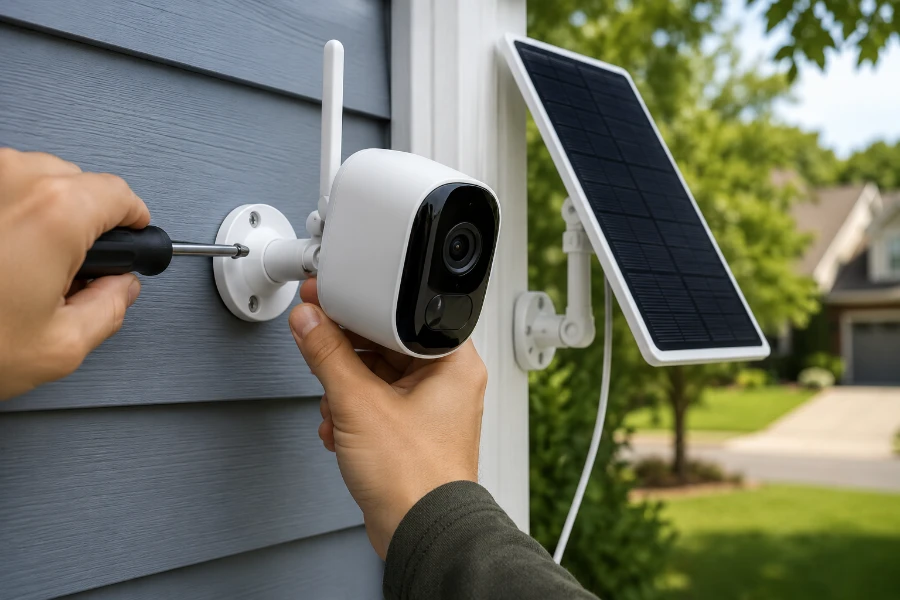
Step 5: Mount the Camera
Once testing confirms the ideal location, it’s time for permanent installation.
Mark the Mounting Points
Hold the bracket in position.
Use a pencil to mark the screw locations.
Double-check alignment before drilling.
Drill Pilot Holes
Pilot holes make installation easier and help prevent material damage.
The appropriate drill bit depends on whether you’re mounting into:
- Wood
- Vinyl siding
- Brick
- Concrete
- Metal
Secure the Bracket
Attach the mounting bracket firmly using the included hardware.
After installation, attach the camera and adjust the viewing angle.
Tighten all adjustment points securely.
The camera should remain stable during heavy wind and weather conditions.
At this stage, you’ve completed the core steps of how to install Reolink Argus camera systems successfully.
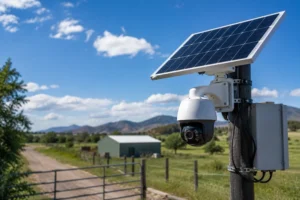
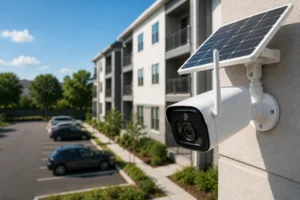
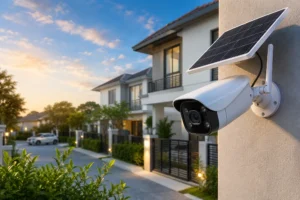
Step 6: Install the Reolink Solar Panel (Optional)
One of the biggest advantages of the Reolink Argus ecosystem is the ability to reduce charging maintenance through solar power.
For many homeowners, adding a solar panel transforms the camera into a nearly self-sustaining security solution.
Instead of manually charging the battery every few weeks or months, sunlight continuously replenishes power throughout the day.
Benefits of Solar Charging
Installing a solar panel offers several advantages:
- Less manual charging
- Improved battery lifespan
- Continuous operation
- Better performance in high-traffic areas
- Reduced maintenance
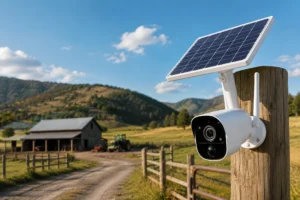
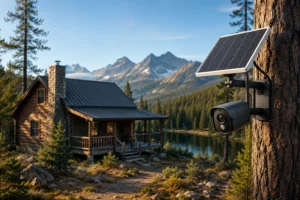
The solar panel works particularly well for cameras installed in driveways, gates, and remote areas where accessing the camera regularly can be inconvenient.
Selecting the Best Solar Panel Location
The solar panel and camera do not need to occupy the same position.
This flexibility allows you to optimize both.
Choose a location that receives direct sunlight for most of the day.
South-facing installations generally provide the best performance in North America.
The technology behind these charging systems relies on photovoltaics, which convert sunlight into usable electrical energy for the camera battery.
Mounting the Solar Panel
The installation process is straightforward:
- Attach the solar panel bracket.
- Position the panel toward the strongest sunlight.
- Tighten all mounting hardware.
- Route the charging cable neatly.
- Connect the cable to the camera.
Avoid placing the panel under roof overhangs, dense trees, or other structures that create long periods of shade.
Even a quality solar panel cannot generate power without sufficient sunlight.
Step 7: Configure Camera Settings for Maximum Security
Physical installation is only half the process.
Proper configuration often determines whether a camera becomes genuinely useful or simply generates endless notifications.
Adjust Motion Detection Sensitivity
Many users leave the default settings unchanged.
That can be a mistake.
Sensitivity settings should reflect your environment.
For example:
| Area | Recommended Sensitivity |
| Front Door | Medium-High |
| Driveway | Medium |
| Backyard | Medium |
| Busy Street | Low-Medium |
Too much sensitivity creates excessive alerts.
Too little may miss important events.
Create Detection Zones
Detection zones allow the camera to ignore specific areas.
Examples include:
- Public roads
- Neighboring properties
- Trees
- Moving bushes
- Sidewalk traffic
This significantly reduces false alerts.
Enable Smart Detection Features
Many newer Reolink Argus models include advanced detection options.
These may include:
- Person detection
- Vehicle detection
- Animal detection
Enabling these features improves alert accuracy while reducing unnecessary notifications.
Optimizing Video Quality After Installation
Understanding how to install Reolink Argus camera systems properly also includes optimizing image performance.
A few small adjustments can dramatically improve footage quality.
Fine-Tune the Viewing Angle
Review live footage from the app.
Look for:
- Blind spots
- Excessive sky exposure
- Glare
- Obstructions
Sometimes moving the camera just a few inches creates a substantial improvement.
Balance Resolution and Battery Life
Higher video resolutions create sharper footage.
However, they also increase:
- Battery consumption
- Storage requirements
- Bandwidth usage
For most residential applications, the highest available resolution provides excellent results, but users prioritizing battery longevity may prefer a balanced setting.
Improve Night Vision Performance
Night vision works best when:
- The lens remains clean
- Infrared reflections are minimized
- Bright lights are not directly facing the camera
Test footage after dark and make adjustments as necessary.
Nighttime performance often reveals issues not visible during daytime testing.
Common Reolink Argus Installation Mistakes to Avoid
Even experienced DIY installers occasionally overlook critical details.
Avoiding these mistakes can save significant time later.
Installing Too High
Many homeowners assume higher placement always means better coverage.
Not necessarily.
Excessive height often reduces facial recognition and important detail capture.
Ignoring Wi-Fi Strength
A camera with a weak signal may experience:
- Delayed notifications
- Live view interruptions
- Missed recordings
Always verify signal strength before final installation.
Poor Solar Panel Placement
Solar charging depends entirely on sunlight exposure.
Even premium solar panels struggle when installed in constant shade.
Overlooking Detection Zones
Failing to configure detection zones often results in excessive notifications from:
- Passing vehicles
- Pedestrians
- Animals
- Moving vegetation
A few minutes of setup can dramatically improve usability.
Forgetting Firmware Updates
Manufacturers regularly release updates that improve:
- Security
- Stability
- Detection accuracy
- Feature availability
Check for updates periodically through the app.
How to Maintain Your Reolink Argus Camera
Once you’ve mastered how to install Reolink Argus camera systems, ongoing maintenance becomes relatively simple.
Fortunately, these cameras require very little attention.
Clean the Lens Regularly
Dust, pollen, rain residue, and insects can affect image quality.
A soft microfiber cloth typically handles most cleaning needs.
Avoid abrasive materials.
Inspect Mounting Hardware
Outdoor environments expose hardware to:
- Wind
- Rain
- Temperature changes
- Vibration
Inspect brackets and screws several times per year.
Monitor Battery Performance
Although solar charging helps, battery performance naturally changes over time.
Review battery statistics periodically through the app.
Check Solar Panel Condition
Leaves, dirt, bird droppings, and debris can reduce charging efficiency.
Clean the panel whenever buildup becomes noticeable.
Troubleshooting Common Installation Problems
Even after successfully learning how to install Reolink Argus camera equipment, occasional issues can arise.
Most are relatively easy to resolve.
Camera Won’t Connect to Wi-Fi
Potential causes include:
- Incorrect password
- Weak signal
- Router compatibility issues
- Network congestion
Start by restarting both the router and camera.
Motion Alerts Are Inconsistent
Review:
- Sensitivity settings
- Detection zones
- Camera angle
Small adjustments often solve detection problems.
Battery Drains Faster Than Expected
Common causes include:
- Frequent motion events
- Excessive live viewing
- Cold weather
- Weak solar charging
Reducing unnecessary activity can significantly improve battery life.
Solar Panel Is Not Charging
Check:
- Cable connections
- Panel cleanliness
- Sunlight exposure
Many charging issues stem from simple shading problems.
Live View Loads Slowly
This often indicates:
- Weak Wi-Fi
- Network congestion
- Router placement issues
Improving signal strength usually resolves the issue.
Is Professional Installation Necessary?
For most homeowners, the answer is no.
The Reolink Argus series was designed specifically for DIY installation.
Advantages of Self-Installation
- Lower costs
- Faster deployment
- Greater placement flexibility
- Easier future adjustments
When Professional Installation May Help
Professional assistance may be worthwhile when:
- Mounting at significant heights
- Installing multiple cameras
- Covering large properties
- Integrating advanced security systems
For a typical home, however, installation remains very manageable.
Final Thoughts
Learning how to install Reolink Argus camera systems is far less intimidating than many homeowners expect.
The combination of wireless connectivity, rechargeable batteries, and optional solar charging removes many of the traditional barriers associated with home security installations.
Success comes down to a few key principles:
- Choose the right location.
- Verify Wi-Fi strength.
- Test before drilling.
- Optimize detection settings.
- Maintain the camera periodically.
Follow those fundamentals, and your Reolink Argus camera can provide reliable security coverage for years.
Whether you’re protecting a front porch, monitoring a driveway, securing a backyard, or keeping an eye on a vacation property, proper installation lays the foundation for effective surveillance.
Take your time during setup. Test thoroughly. Fine-tune the settings.
A few extra minutes today can deliver better security, fewer false alerts, and greater peace of mind long after installation is complete.
FAQs
For most homes, a mounting height of 8 to 10 feet provides the best balance between security and image quality.
No. Most homeowners can complete the installation using basic tools and the Reolink mobile app.
The camera can record locally, but Wi-Fi is needed for remote viewing, alerts, and app-based management.
Battery life varies based on usage, but many users get several weeks to several months between charges.
Yes. Most Argus models are designed for outdoor use and can withstand rain, snow, and typical weather conditions.
In areas with adequate sunlight, the solar panel can significantly reduce or eliminate the need for manual charging.
Most Reolink Argus cameras connect to 2.4 GHz Wi-Fi networks for greater range and stability.
Adjust motion sensitivity settings and create detection zones to ignore roads, trees, or other high-traffic areas.
Yes. The Reolink app allows you to access live video, recordings, and camera settings from anywhere with an internet connection.
Inspect the camera and solar panel every few months, and clean the lens whenever dirt or debris affects image quality.